Small Business Series : Photography for Beginners
Take Better Photos Series
Take Better Pictures Without a DSRL
Photography Gear Recommendations
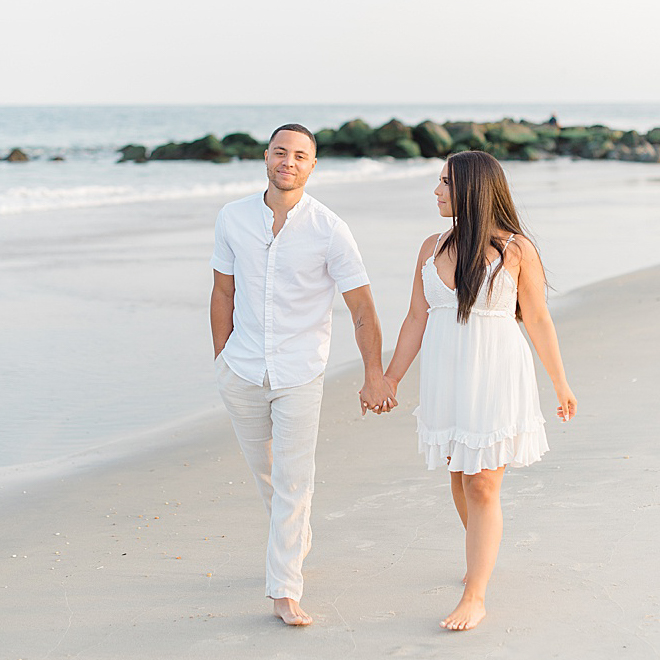
Best Natural Engagement Photo Poses & Ideas
Master Shooting in Natural Light
Hi Friends!
I’m starting a new small business series- Photography for Beginners! I am so excited about this because so many of my clients love having beautiful photos but may not want to hire a photographer every time they need a nice picture to post on Instagram, right? So whether you are a mom just wanting to take a nice picture of your kids or have a dream of starting your own business, this post is for you!
I will say- its no secret that I think everyone should start their own business. And the great news is that these days, its easier than ever. I am secretly starting this series with the hope that I can help you chase your dreams because life is too short to be stuck in an office! But, even if you have no desire to start your own business (yet!) that’s totally fine! There are still tons of reasons why you may want to take great photos and I can definitely help you do that.
So, I hope you love this series. Make sure you leave a comment or email me and let me know what other topics you want me to tackle. And don’t forget to check out my gear list recommendations for getting started!
Here we go!
Today we are going to start with the very basics of how to shoot in manual mode. I realize it can be intimidating at first, but once you get the hang of it, it will become second nature, I promise!
Why Learn to Shoot in Manual Mode?
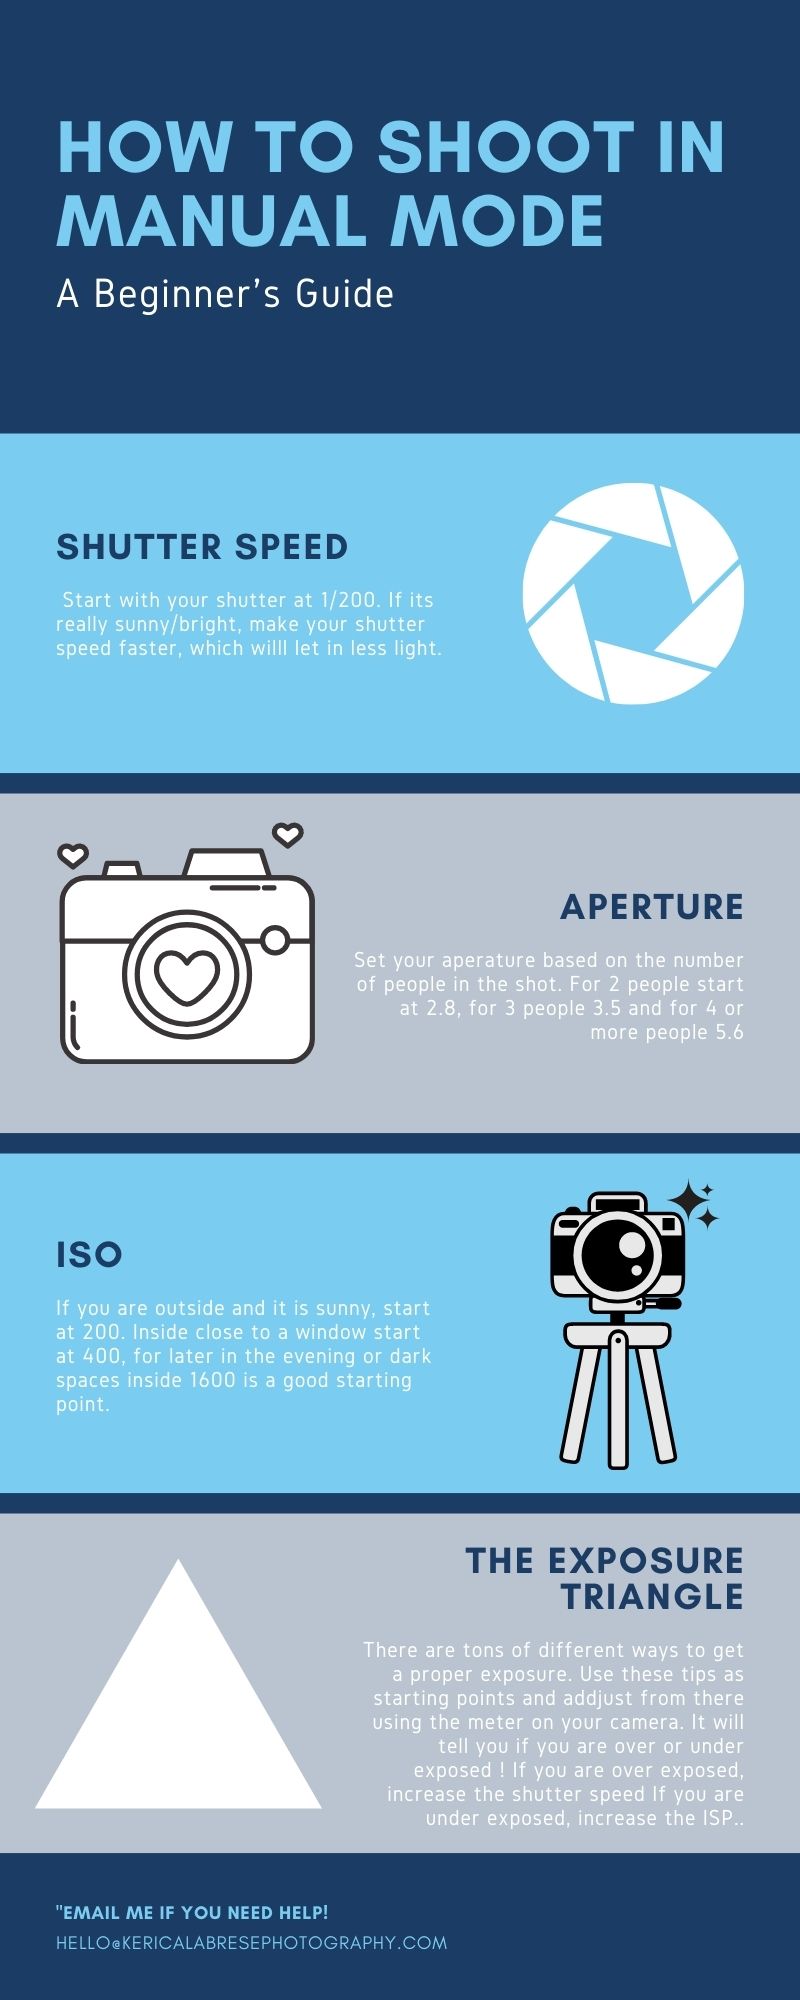
Before we get into the how of mastering manual mode, you may want to know why you should bother learning it. I know it can be scary to dive into but the truth is if you want to take better pictures, this is something you will want to learn! Having control over your settings allows you to create exactly how you want the photo to look. You will also be able to create a consistent look by mastering your settings. When you shoot in automatic, you are at the mercy of the camera. When you control the settings, you create the look and feel you are going for. This will help you develop a consistent style and signature look. Finally, learning to master your settings will allow you to take pictures in tricky lighting situations like harsh back light (see below).
How to Shoot in Manual Mode
Settings: Shutter Speed: 1/1000 // Aperture: 2.5 // ISO: 125
Settings Explained
This was taken on a very sunny day, so my shutter speed is set pretty quick (1/100) and my ISO is very low (125). The aperture is pretty wide open to get that glowy look but not so low that the sky would be blown out and overexposed.
Making Adjustments
The great thing about learning to shoot in manual mode is that its okay to make mistakes. Just say I didn’t nail the exposure on this the first time. I would have a couple of options to save it. First, I could look at the back of my camera and see that the photo was, let’s just say- underexposed or too dark. I could then adjust my settings and try again. If the above photo came out to dark at the settings I listed, the next step for me would be to either slow my shutter speed- maybe to 1/500 OR I could increase my ISO. The ISO could be increased to 200, or maybe 400 if the photo was really dark.
If, maybe you didn’t notice that your exposure was off right away, the next step would be to make adjustments later in Lightroom. I use Lightroom Classic and I pay $10 a month for Lightroom and Photoshop. I spend almost all my time in Lightroom and rarely use photoshop but that is another post! Once you’re in Lightroom and you realize your photo is too dark, you simply increase your exposure until it looks like you want it to!
Now, these adjustment tips (especially the second one!) only work if your exposure was just a bit off. If your photo was completely black, that would be very difficult to save. But as you are learning, these are great ways to get closer to perfect exposure every time. And, let’s be honest- no one is perfect. I don’t nail my exposure every time, especially on a fast paced wedding day or in difficult lighting scenarios!
The Gear: DSRL Camera
I would love to know where you are at- do you have a DSRL camera or do you take your photos on an iPhone? Email me and let me know! I get questions all the time about my gear and how to shoot in manual mode and the truth is- its pretty easy! Finding great lighting- now that’s another story. But learning to use your camera is the easy part! Many of my clients and friends have a DSRL camera, which is a great start. If you don’t have one and need recommendations for this let me know! I’m always happy to help. DSRL camera’s take great pictures, but so does your iPhone! If you really want to leverage the full capabilities of your fancy camera then keep reading! I use a Nikon D750 which is a full frame camera, but if you are just starting out, I recommend getting a crop sensor camera. For example, the Nikon D 5500 or the Canon Rebel are great places to start! I also recommend getting a 50 mm 1.8 lens. Email me if you need help about where to start with gear and check out this post for more specific recommendations!
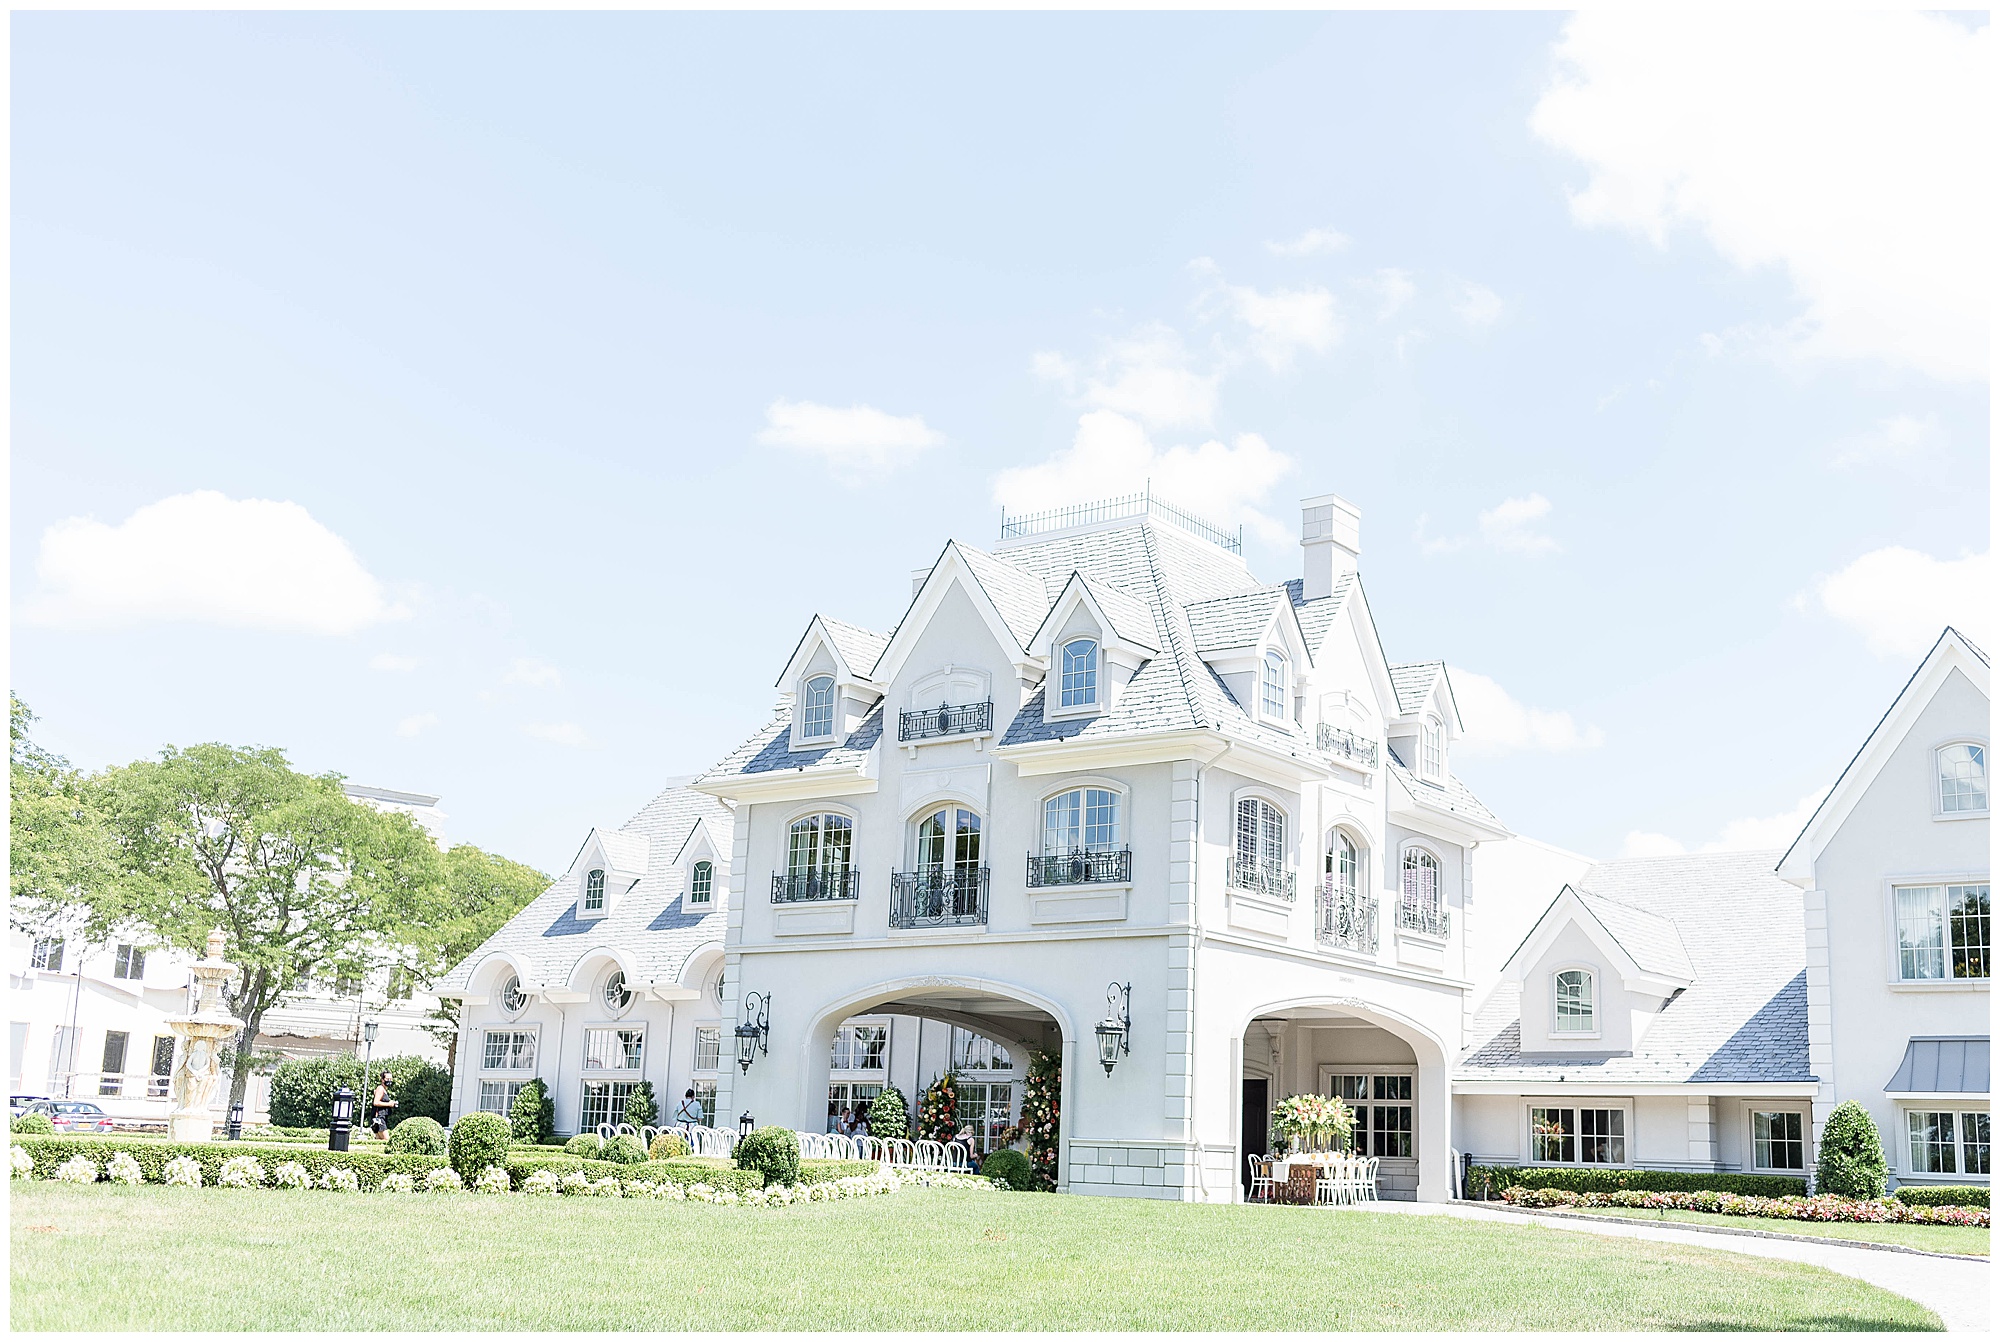
Exposure Triangle
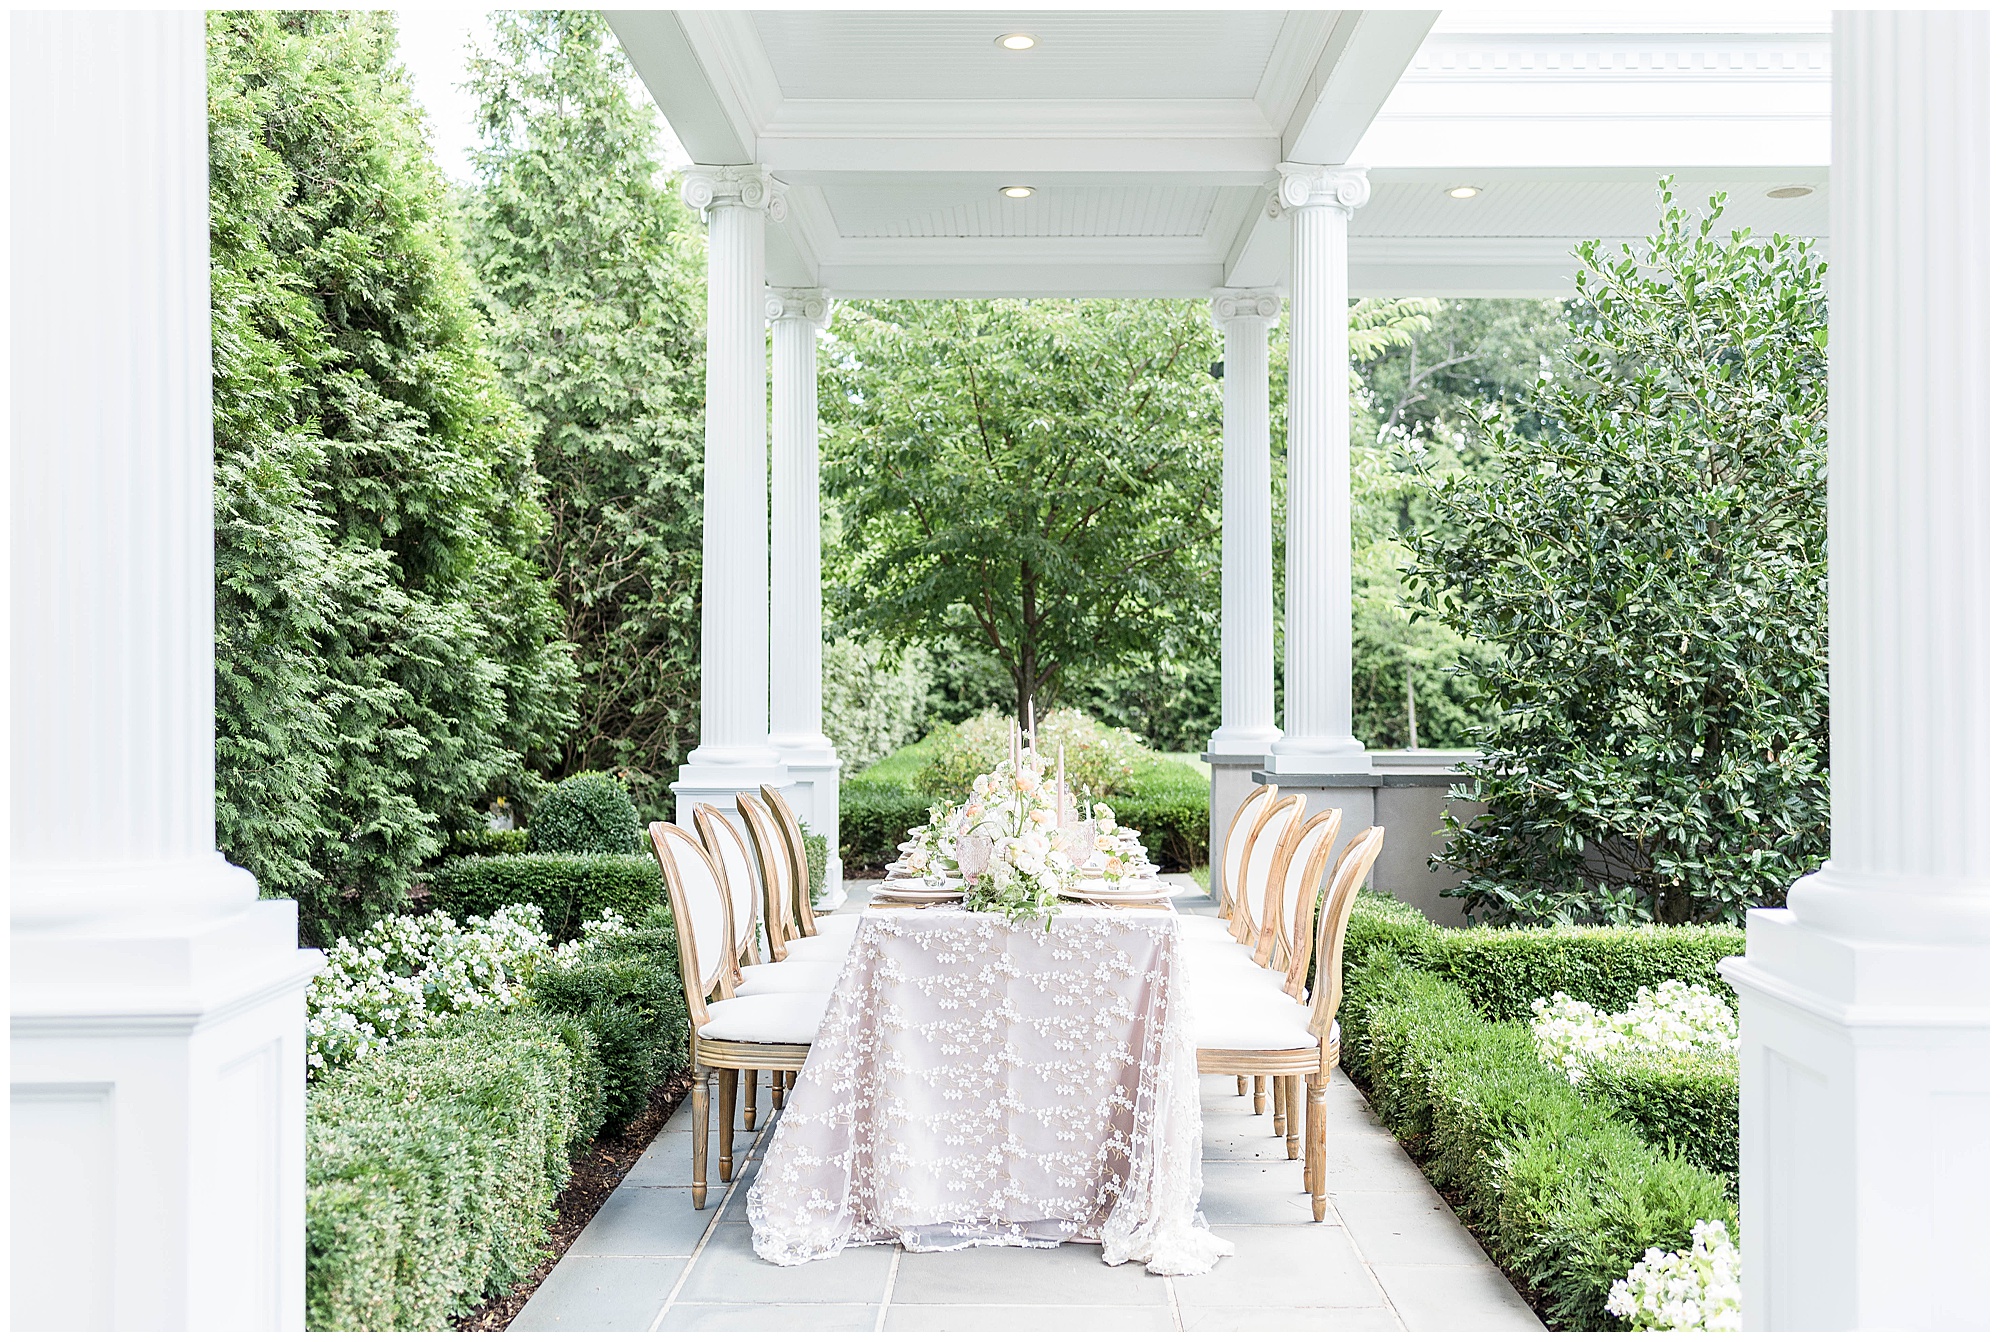
Settings: Shutter Speed: 1/500 // Aperture: 2.5 // ISO: 250
Manual Settings Explained
This gorgeous little table was set under a covered patio, so it wasn’t in direct sun even though it was a sunny day. My ISO is at 250 because it was a sunny day, but the porch was able to diffuse some of that extra light. My aperture is at 2.5 because there are no people in the shot. I want the details to be in focus but allow for a little dreamy quality to the background. And my shutter is at 1/500 to round out the exposure.
In order to get a perfect exposure, there are 3 factors: Shutter Speed, Aperture, and ISO. I’ll talk about each one of them below.
Shutter Speed
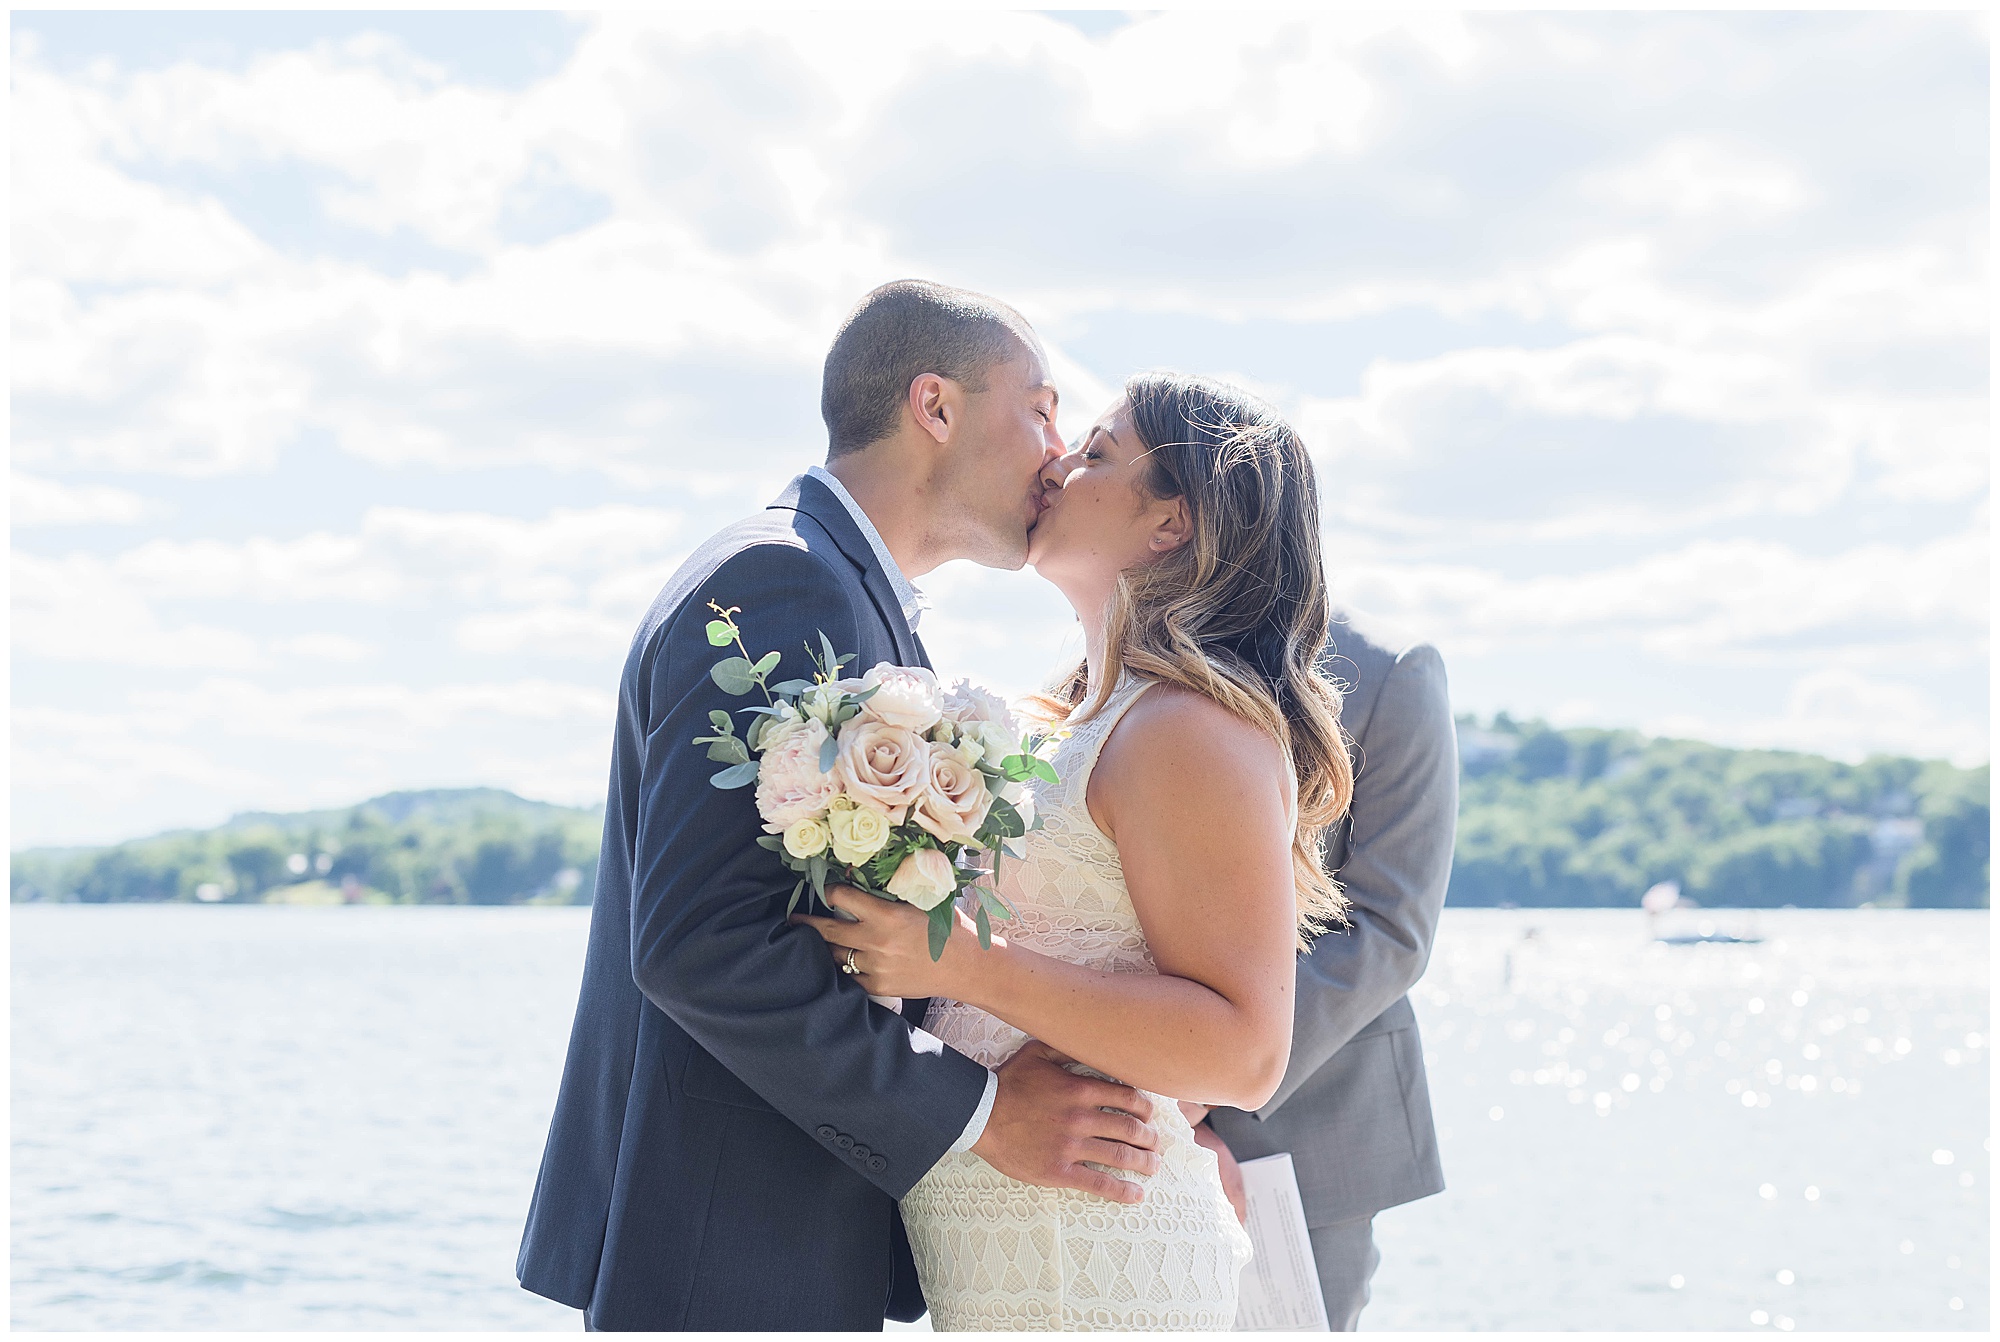
Settings: Shutter Speed: 1/1250 // Aperture: 4.0 // ISO: 200
Manual Settings Explained
In the photo above, it was a really sunny day. I was standing in the shade and shooting into the couple who was strongly backlit by harsh sun. I set my aperture to 4.0, even though there are only 2 people in the photo as to not let in too much light. My ISO is set a 200 because it was sunny but I was also standing in the shade. Finally, I increased my shutter speed to 1/1250 to stop too much light from getting in and over exposing the photo.
Here’s a video I made for you about how to change your shutter speed on almost any DSRL camera:
Shutter Speed: An Overview
I always found shutter speed pretty self-explanatory and one of the easiest to understand. Shutter speed is how quickly or slowly the shutter opens. The longer the shutter is open (the slower the speed is set), the more light is allowed it. The shorter amount of time the shutter is open (the faster the speed), then less light can enter. The tricky part is that shutter speed is measured in a fraction of a second. The fastest shutter speed is 1/4000 meaning, one four-thousandth of a second (super fast!) On the other hand, you can set your shutter speed to super slow, open for a whole second, for example to let in lots of light. I don’t recommend doing that (especially without a tripod!) but hopefully that helps for understanding purposes.
Manual Mode: Shutter Speed for Beginners
I love to basically set and forget my shutter speed at 1/200. I almost never go below that (slower) because that is when photos start to get blurry. The technical rule for shutter speed is not to go below the number leas you are using. For example, if you are using a 50 mm lens, the lowest you would ever want to set your shutter speed is 1/50, however, I NEVER go that low.
I will, however, speed up my shutter speed in a couple different scenarios. First, if we are shooting in bright light. For beginners, I would recommend starting at 1/200 then moving on to set your aperture where you want it and your ISO (more on those below) then go back and adjust your shutter speed if necessary. Another time I will increase my shutter speed is if I am photograhing children, because, well, they move quickly! If your subject moves quickly, you will also want your shutter speed to move quickly to catch the movement without blur.
To set the shutter speed on most cameras, first, make sure you are in Manual Mode. This is probably indicated by an M on the top left dial of your camera. Then, with your camera held to your face, using your right thumb, scroll the dial on the back. Scrolling to the right will speed up your shutter and scrolling to the left will slow it down. For more specific instructions on how to use your exact camera, you may have to google the model and how to set shutter speed. I’m confident you will find lots of help!
Does this make sense? Comment with your questions and I will update this post with the answers.
2. Aperture
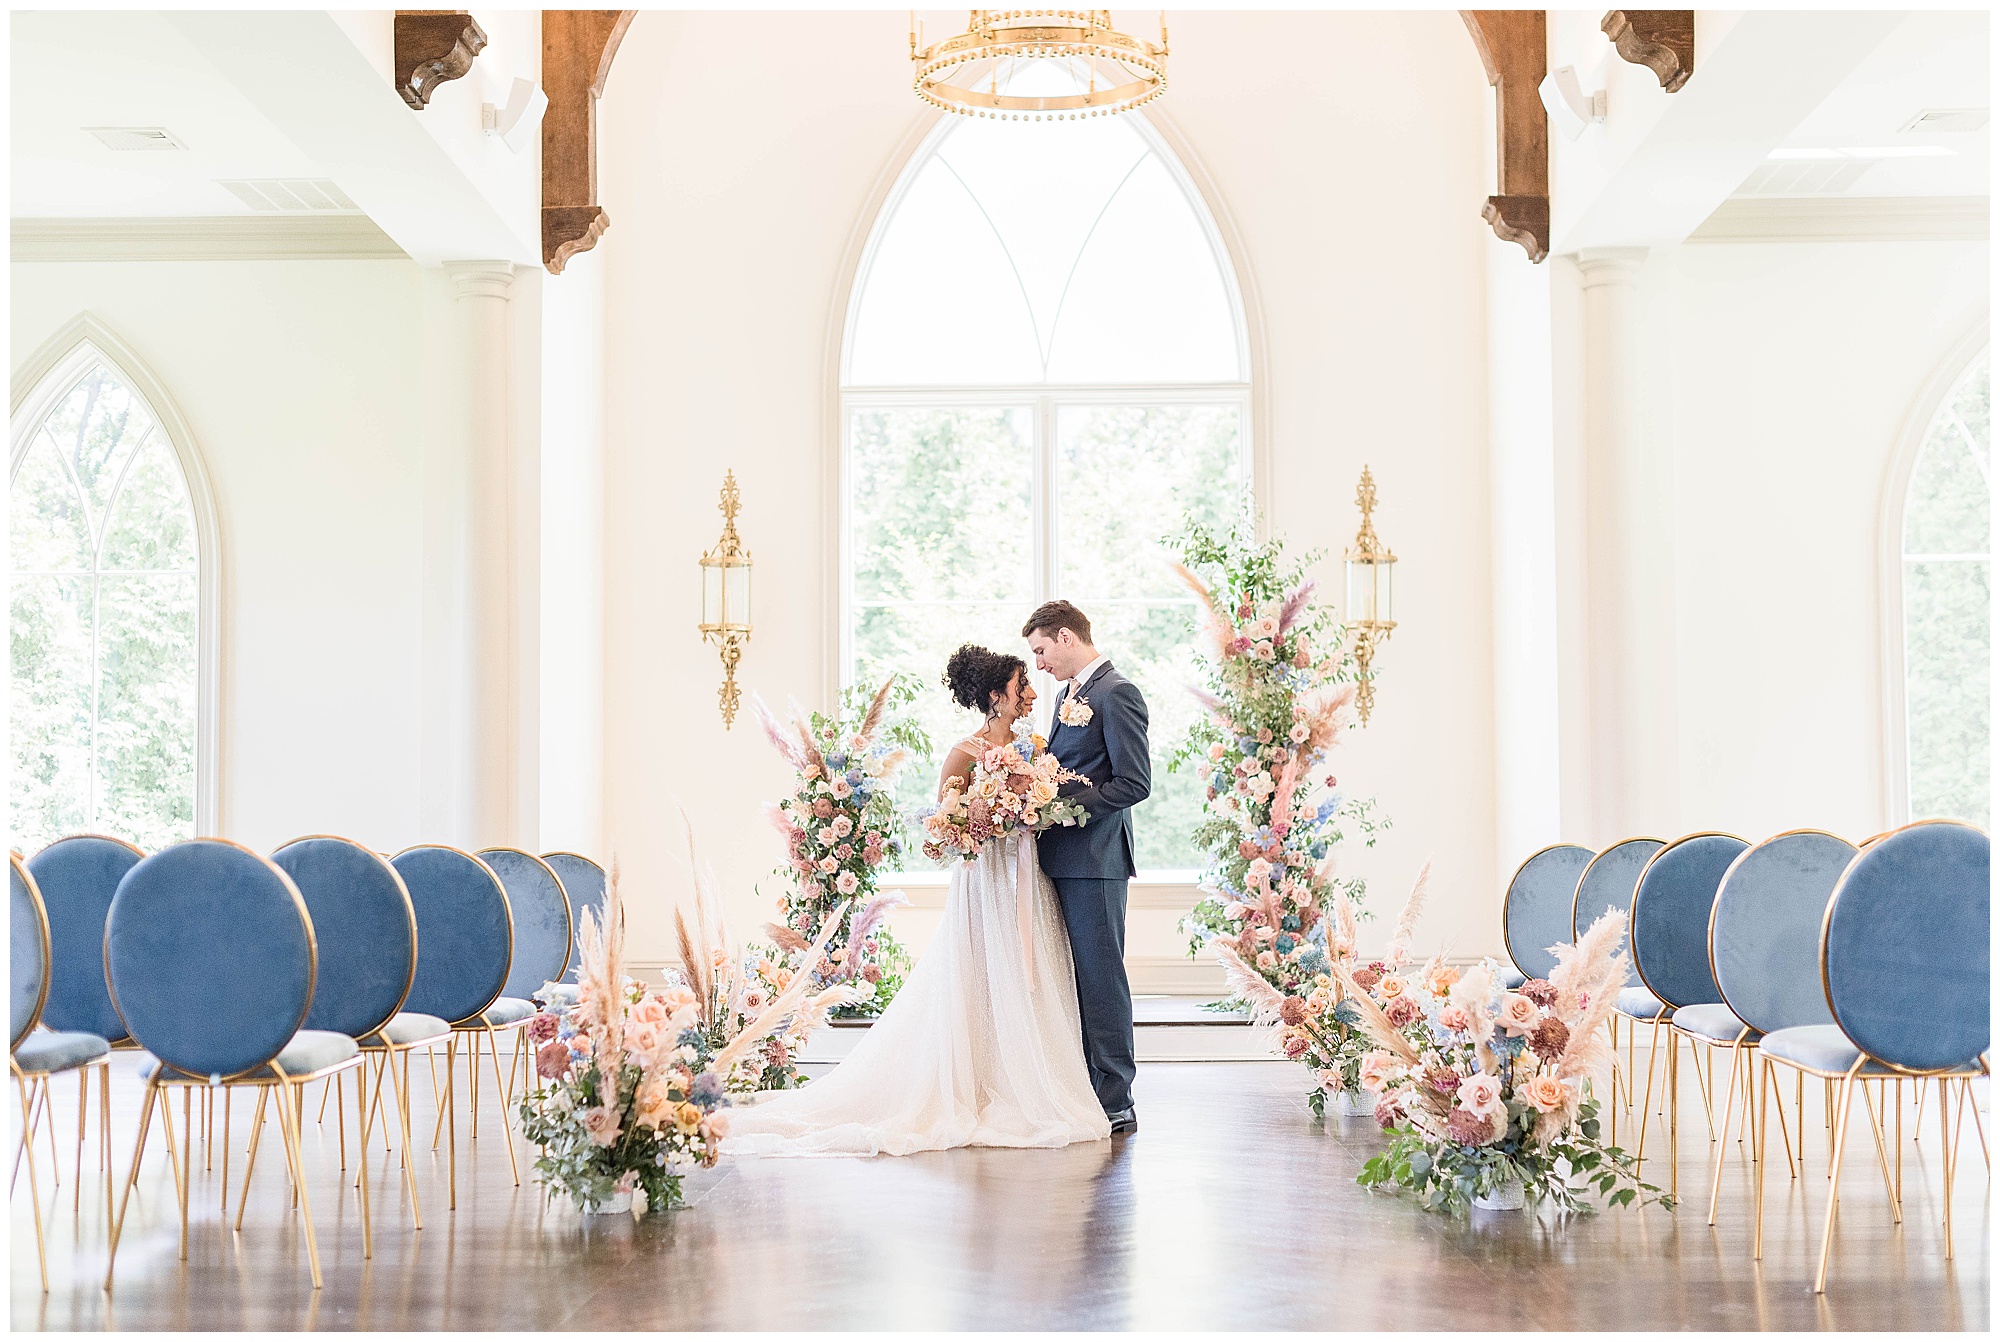
Settings: Shutter Speed: 1/500 // Aperture: 2.5 // ISO: 800
Indoor example: ISO is higher because we were indoors. I didn’t need it too high because the chapel has lots of windows. My aperture is set at 2.5 because there are 2 people in the photo and I adjusted my shutter speed to 1/500 to complete balance the exposure. I probably started at 1/200 then increased the speed so I didn’t overexpose.
Next up, we have Aperture. Aperture can also be referred to as F-Stop and is what has the ability to create that blurry background that so many photographers (like myself!) love. Aperture has the ability to completely transform what the background of your photo looks like.
The range of aperture is actually determined by your lens, not your camera. You can purchase a 50 mm 1.8 lens, a 1.4 lens or a 1.2 lens. If you are reading this article, I would recommend starting with the 50 mm 1.8 lens. Its a super affordable, workhorse of a lens that takes incredible photos. You can pick one up for around $200. Even though I do have a professional 50 mm lens, I never actually shoot below 1.8. The number after the lens is referring to the aperture, or depth of field. So, a 1.8 (or 1.2/1.4) aperture setting will produce a very shallow depth of field, or blurry background as seen below. A higher aperture setting like, 5.6 or higher will produce a very crisp background with everything in focus (depending on the amount of space behind your subject)
How to Shoot in Manual Mode: Aperture for Beginners
There are many factors to consider when you are setting your aperture. The 3 important ones I want you to consider are:
- The distance between you and your subject.
- The amount of space between them and the background. For example- are they up against a brick wall? Or is there an empty field behind them?
- The number of people in the photo.
When you are taking pictures of people, set your aperture by the amount of people in the photo. Let’s say, for example, if there are 1-2 people in the photo. I would then stay in the 2’s range (2.0, 2.5, 2.8, etc.) If there are 3 people in the pictures I would stay around 3.5, 4 people, 4.0+, 5 People 5.6 or higher. See examples below.
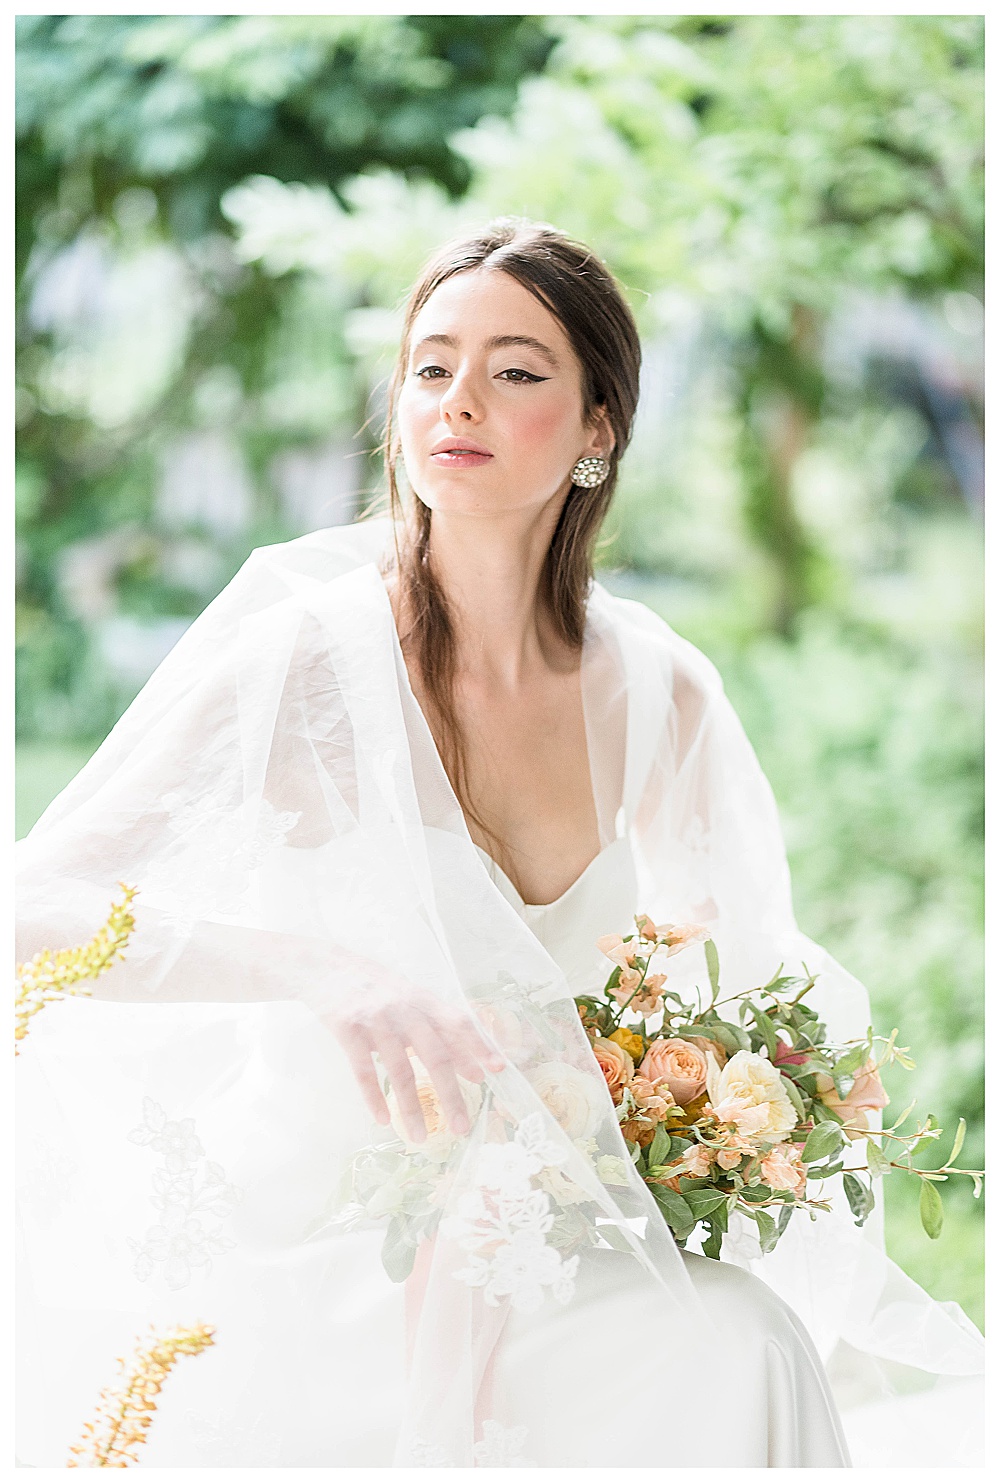
This photo was shot at Golden Hour (the prettiest time of day for photos).
Settings: Shutter: 1/250 // Aperture: 2.2 // ISO: 500
3. ISO
Settings: Shutter: 1/1600 // Aperture: 4.0 // ISO: 100
Finally, we have ISO. This was always the trickiest concept for me to understand. But once I mastered shooting in manual mode it became second nature to me. And it will for you too! In the beginning, I recommend focusing on setting the shutter speed and Aperture first. Then adjust your ISO to balance out the exposure. Here are some places to start with your settings:
Sunny Day: 100
Cloudy Day: 400
Inside: 1600
Settings Explained
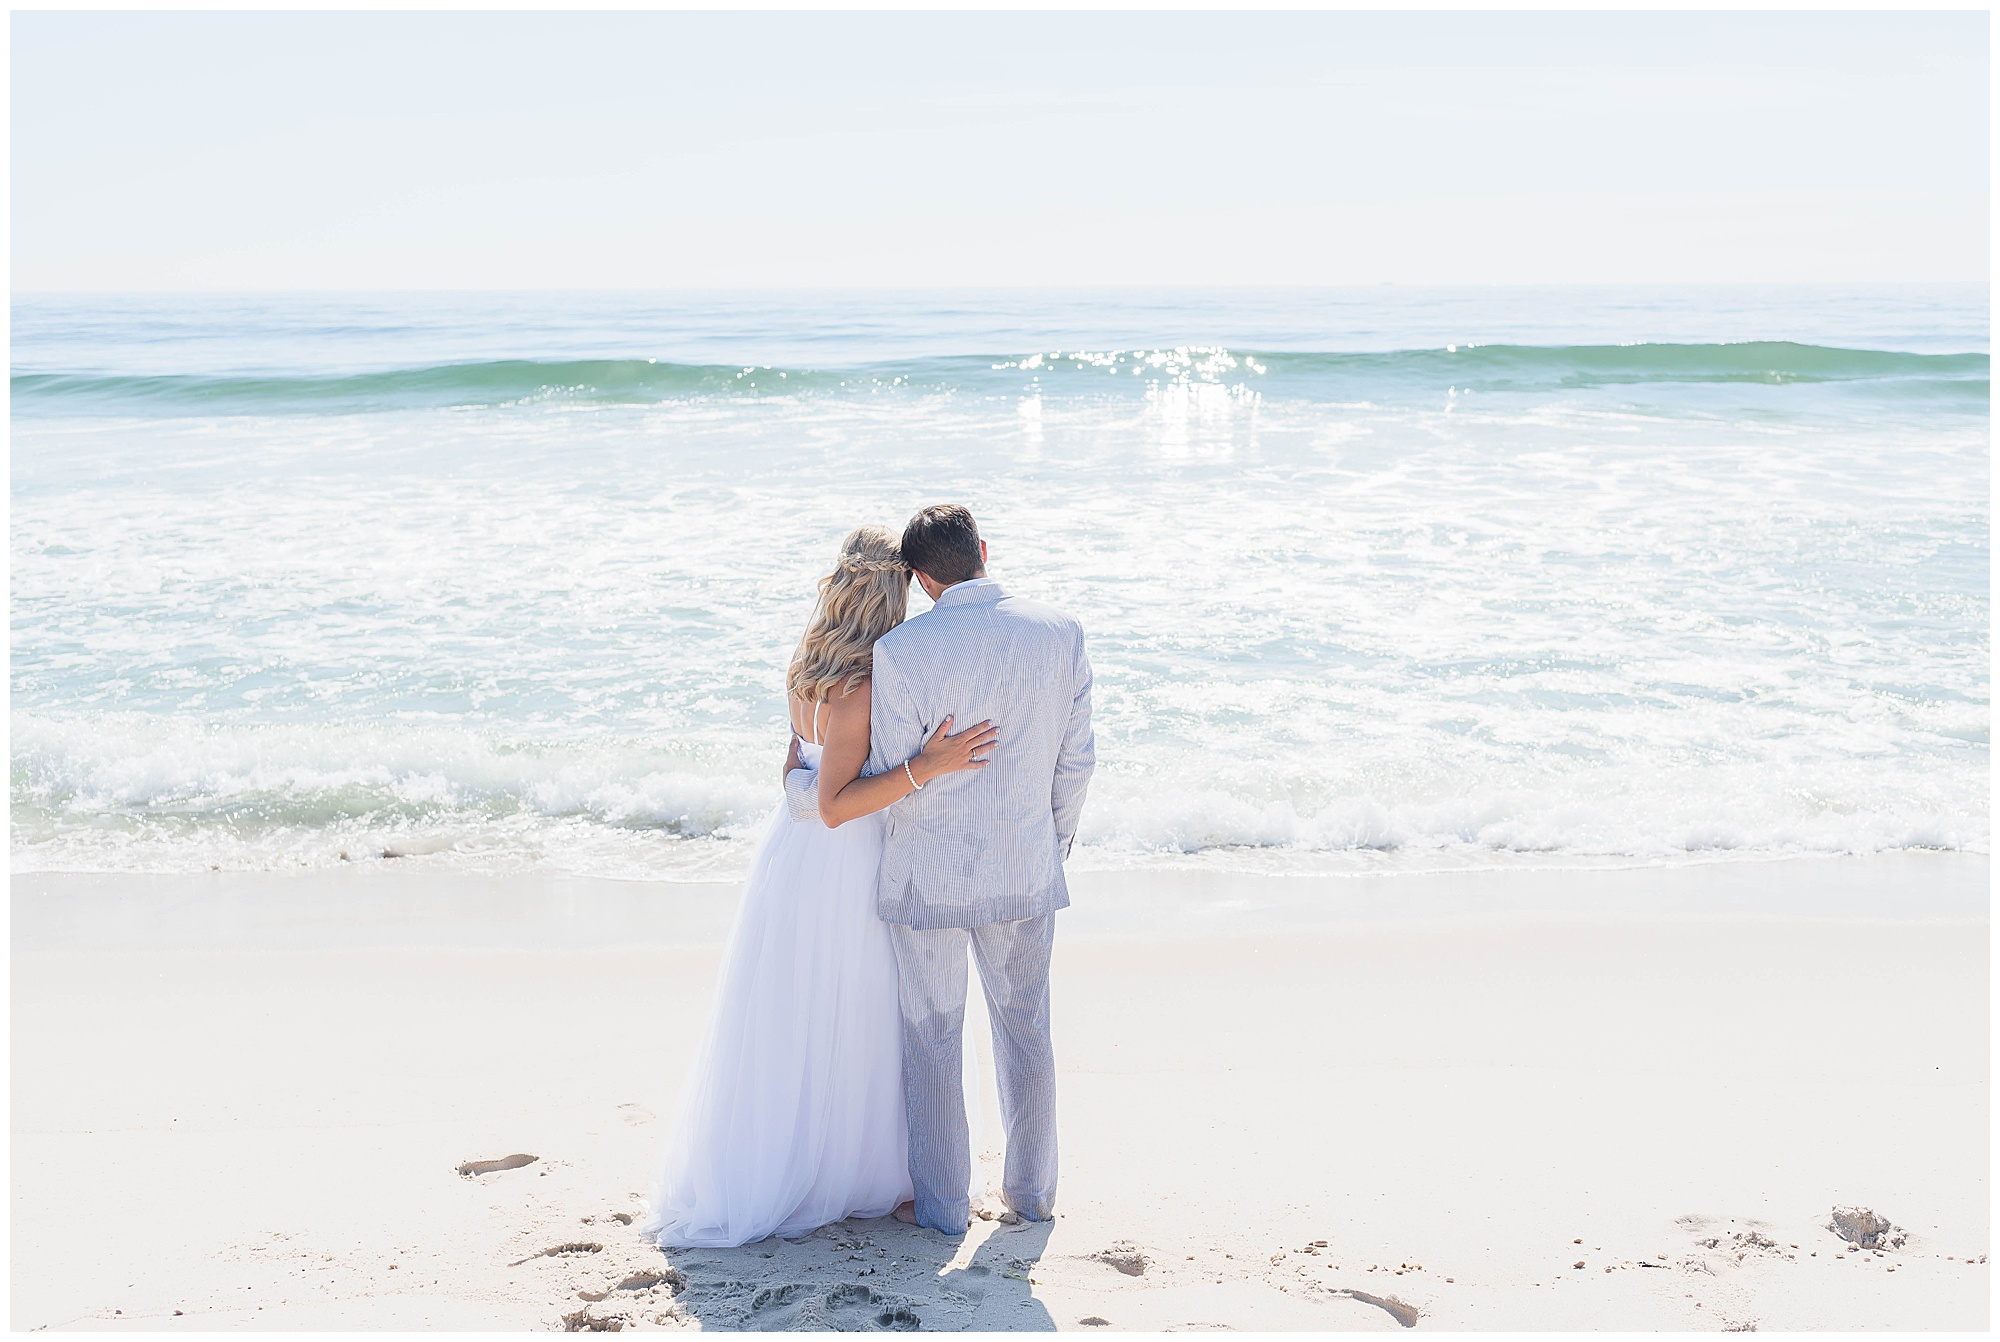
See how in the above example, it was a really sunny day on the beach. I set my ISO at 100 because I didn’t need any extra light. My aperture is at 4.0. If I shot this too “wide open” (with a shallow aperture), too much light would have gotten in. The photo would be over exposed. My shutter speed was pretty quick at one, one-thousandth of a second. This prevents too much light from getting in.
How to Shoot in Manual Mode: Conclusion
Pin This Image
I hope you learned a lot! If you have specific questions, make sure you email me! Next, we are going to talk about finding flattering light. Email me if there is anything else you want to learn about!
If you liked learning about how to shoot in manual mode, make sure you check out my list of Free Ways to Boost Your SEO. Here is another post on shooting in manual mode that I found helpful. Also follow along on instagram for more tips.
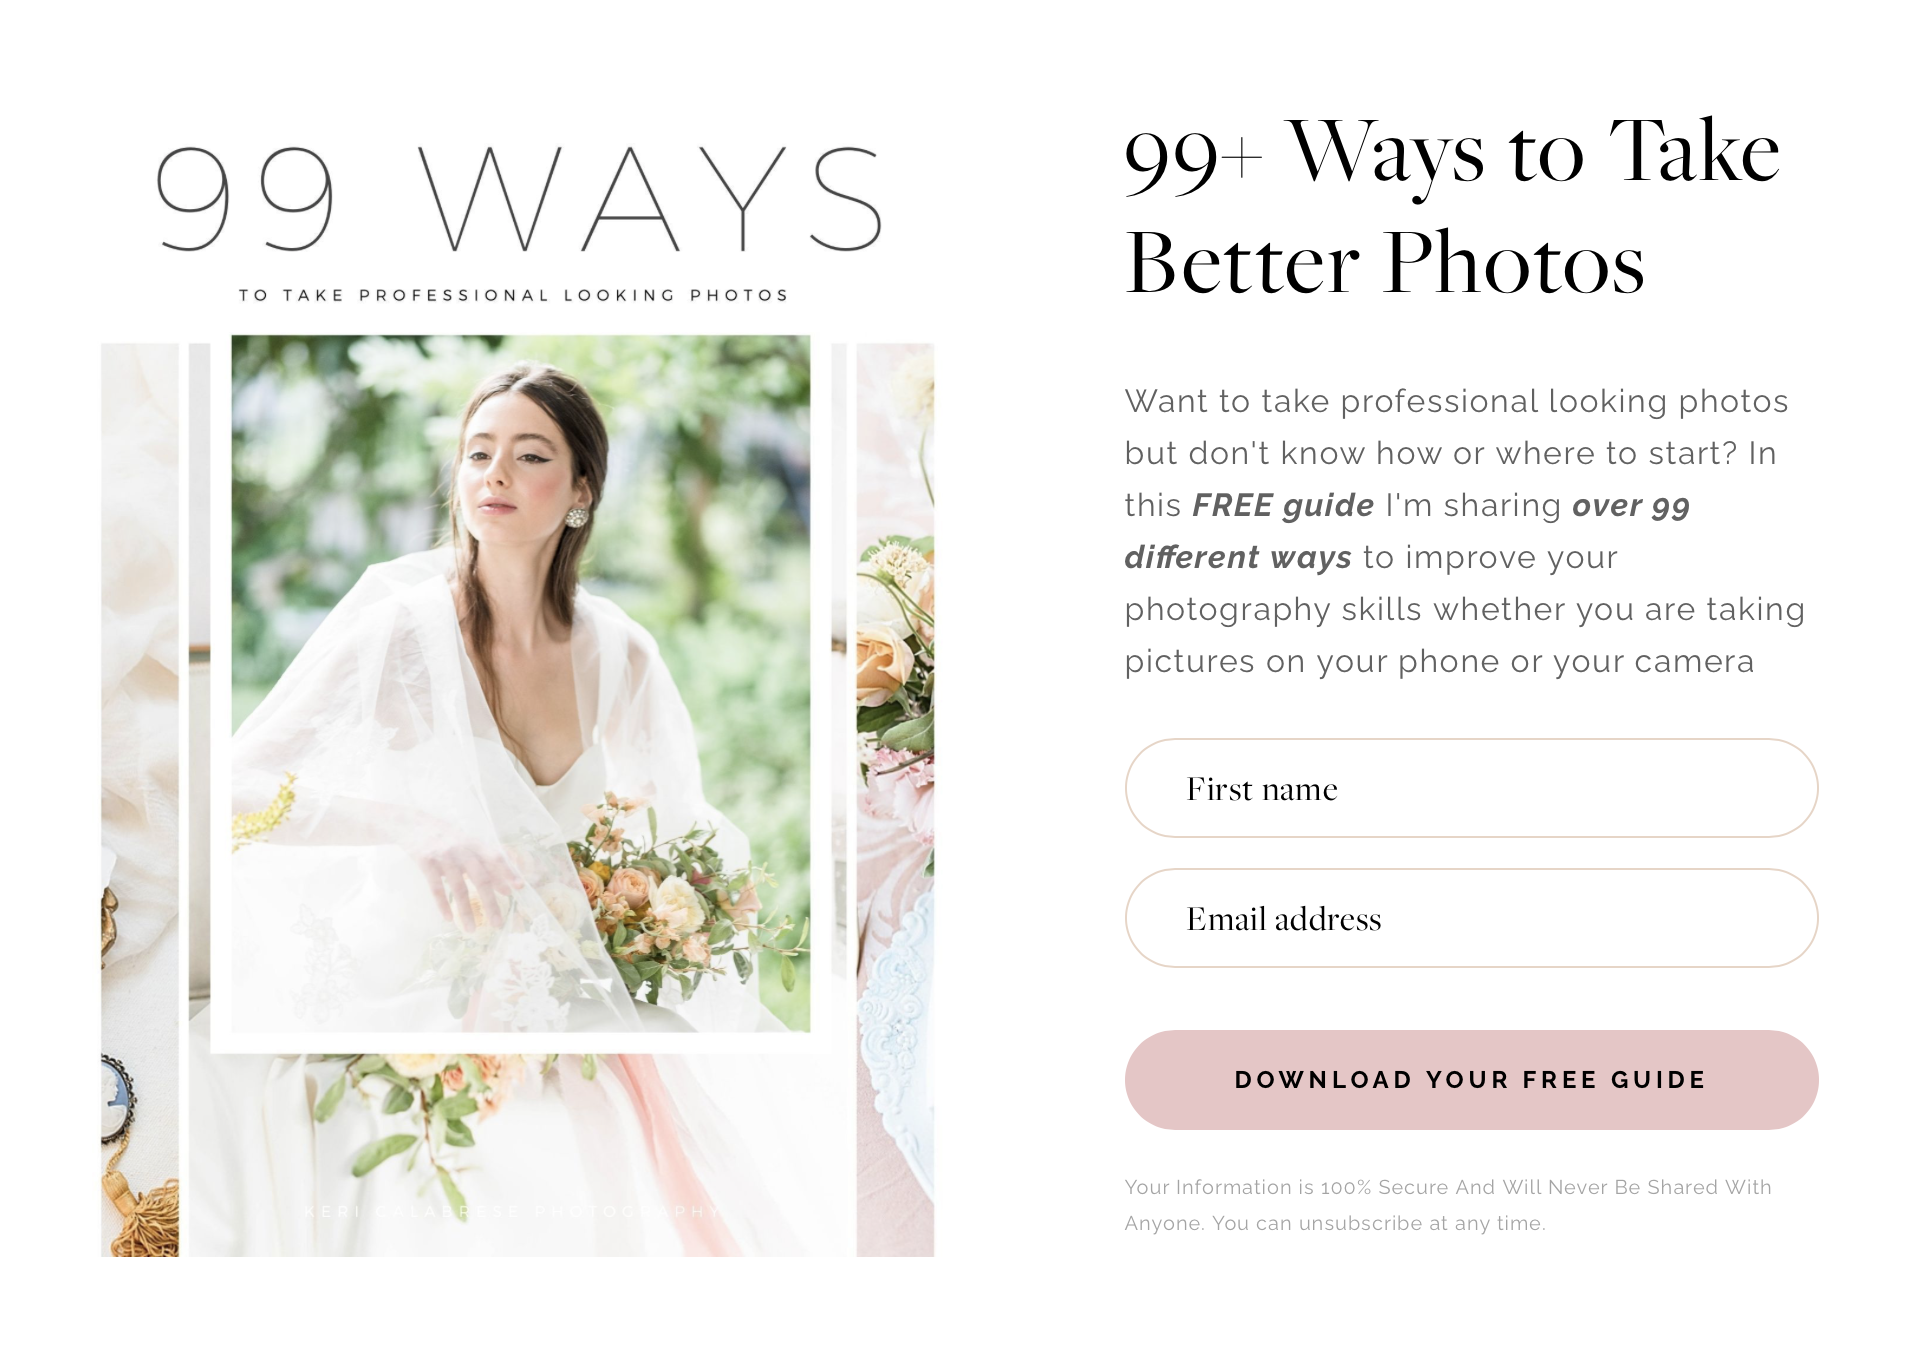
Finally, for more photography tips don’t forget to grab my freebie- 99 Ways to Take Better Photos.