As a photographer, I get 1 really common question from people:
I’m happy to give advice about camera gear. And actually, I plan to in another post. But, first, before you go out and spend lots of money on gear, its important to learn a few basics about how to take better pictures in general.
In this post I will help you:

I promise- you don’t have to be a professional photographer or have an expensive camera to take professional looking photos.
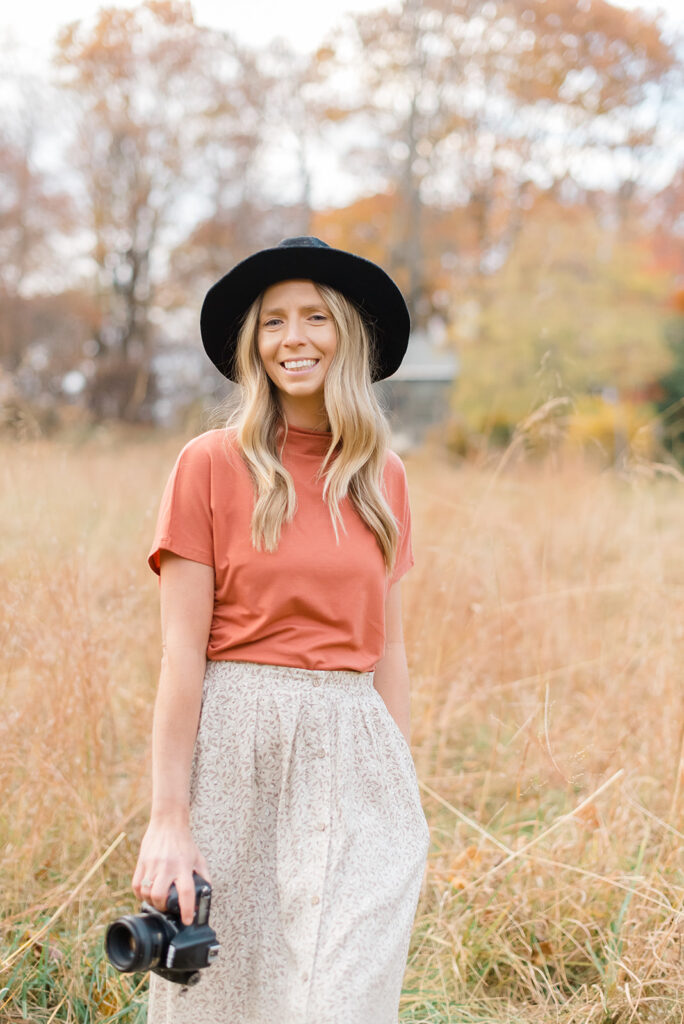
About Me
My dad bought me my first Nikon Dsrl camera a few months after my son was born. I wanted to learn to use it right away, but I had a lot to learn! You know the whole “blurry background” that everyone loves? Well, I thought that was what made a photo look professional but boy, I was so wrong. I loved to over expose my photos so they looked “Light and Airy” but they really were just super overexposed.
There are so many wedding professionals that are needed to make a wedding day so beautiful. And while I do believe in sharing my photos with all of the wedding vendors involved, I am only one person. The couple is my main priority. They paid me for photos of their wedding day and they are my highest priority. And while I ALWAYS send the entire gallery to the vendors as well, it can take a few weeks or even months for the vendor to get photos of their own work. These days, with the power of instagram and social media, positing immediately IS important. Everyone is looking for instant gratification these days and the sooner you put your work out there the better!
Moms
As I mentioned above, this is how I got started in Photography. But, more on this in another post. Maybe you are a mom who wants to take pictures of her kids. Maybe you want to take your own Christmas card photo or just document the little moments. This post is also for you!
So here we go!
These are my best tips for taking professional looking photos right on your phone.
Follow these steps to elevate your photos.
Clean Your Phone’s Camera Lens
I know, I know- this is a basic one. But its important. Our hands are all over our phones throughout the day. Or if you are like me- your kids hands are touching your phone all day. Clean your cameral lens before you take any photos. I also do this with my professional gear. On a wedding day, or during a shoot, I carry around a cloth cleaner with me and wipe down both the inside and outside of my camera lenses every time I change a lens. Its a simple tip and one that will come naturally once you start doing it.
2. Find the Best Lighting
This is the most important tip, but also the most difficult one to master. This could be a whole post or series on its own but I’ll give you my best tips here. Don’t be afraid to reach out if you don’t understand or need more info on lighting! This took me years to master, but the truth is- it isn’t that complicated.
Turn off all indoor lighting. This is very important as indoor lights cast an orange glow.
This means you will have to take your pictures in a well lit room with windows during daylight.
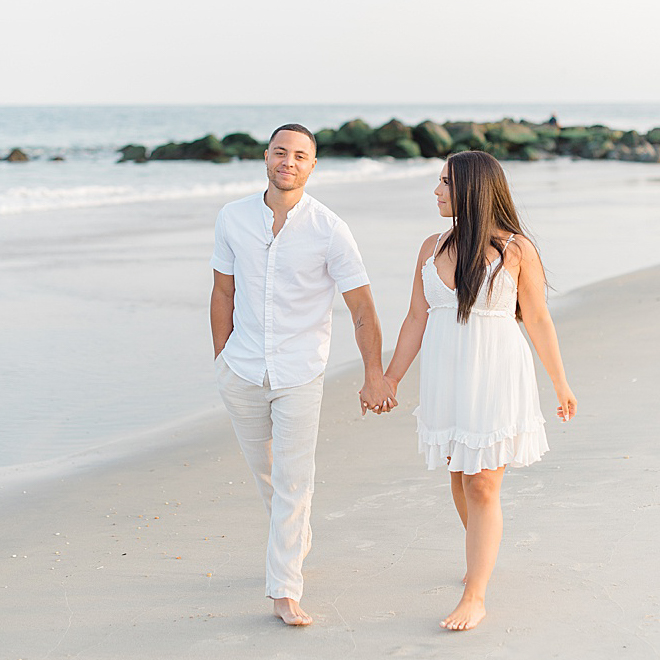
Face your subject toward the window. Position yourself between your subject and the window (with your back to the window). This one tends to sound more complicated than it is. Think about it- it makes sense that the lighting is the best when the natural light shines on your subject’s face.
Many photographers I know love to shoot into the biggest or prettiest window in a room. This happens frequently in hotel rooms for bridal prep when your options are limited. But shooting into the light (also called, backlighting) can be tricky, especially inside. This is because all the pretty light floods your lens (or in this case your phone) and your subject’s face ends up looking really dark.
When you are first getting started mastering lighting, make sure the person or objects you are taking pictures of are facing a window and place yourself in between.
If you have the flexibility to move your subject around, try to have a clean background behind them. This may mean moving furniture out of the way or taking pictures off a wall. When I go to a client’s home, the first thing I do is find the room with the best light. Next, I get to work on cleaning the room. This part is not glamorous. Its about finding the calm in the chaos. A clean gray wall facing a window makes for a really clean, editorial look.
Shooting Outside
Okay, here we go. Mastering outdoor lighting is probably the trickiest part of photography. The good news is- that once you figure it out, you can find the best lighting in any situation.
Take Better Pictures: Golden Hour
When you are first starting out, try to take all of your pictures during golden hour (or on a cloudy day).
Golden hour is the hour before sunset and the hour after sunrise.
Of course, this hour will change based on the time of year, so make sure you google the sunrise and sunset before you schedule a shoot!
Golden hour light is the softest, prettiest light there is and is the most flattering lighting situation. You can basically take pictures in any location, at any angle during this time. It may take a a little practice, but this is the best time to learn.
Mastering Lighting
Its obviously not possible to always take your outdoor pictures during golden hour. Although I wish it was! Sunlight is harshest during midday (12 noon being the worst time too shoot). The good news is, the farther away from 12 noon you get, the softer and less harsh, lighting becomes.
During times other than golden hour, it is especially important to know how to light your subject.
There are a variety of ways to do this.
Backlit
Backlighting is when the sun is behind your subject. This means you are shooting into the sun (or light). It can be tricky to do, if the sun is not soft enough, so I tend to only use this technique during golden hour or indoors. You may also need to use a reflector to make sure you subject’s face is not dark.
Another tip for backlighting is to make sure you keep the sun out of the shot. I like to pin it behind a tree or just keep it off of your lens. This will reduce lens flare.
Frontlit
If you properly front light your subject, this will produce a really clean and well lit shot. Front lighting is when your subject faces the sun. Again, this can be tricky to do midday because the sun will be in your subject’s eyes. This can cause them to squint. Therefore, again, you will need to pin the sun behind something so it is not in the shot. This may require finding shade.
Open Shade
Open shade is the best lighting for front lit photos. This is when your subject is placed in the shade, but there is nothing above their head. For example, the sun may be behind a building, causing your subject to be in the shadow of the building. If they were to look up, they can still see the sky. Am I confusing you yet? An example of not being in open shade would be standing in an archway of a building. Your subjects may be in the shade, but the building is directly over them. This would produce a darker photo because not as much light can get to them.
That’s enough on lighting for one day. I will touch on it more in part 2. For now, let’s move on 🙂
2.) Clean up the Background
A cluttered background can make even the most beautiful photo look unprofessional. Whether you are shooting a inside or taking a picture of you kids playing outside, a clean and clear background always elevates a photo. Don’t be afraid to take a few moments to set up the shot. In the bridal suite this means recruiting bridesmaids to help me clean up the room. We toss all empty water bottles, garbage, food etc. Move all bags, make up, toiletries, clutter etc. into another room or on the other side of the room. As I touched on above, a clean wall, building, field, etc. will greatly impact the photo.
3.) Framing the Shot
On my professional camera, 95% of the time, I use what is called a prime lens. This means the lens doesn’t zoom. I choose the best lens for whatever I am shooting and then I move closer to the subject (whatever it is I am shooting) or farther away.
When shooting with an iphone (or any phone), you want to get as close to your subject as possible, and then adjusting just a tiny bit with the zoom. If you are too far away and zoom too much, it can result in a blurry, low resolution image.
Cropping
When framing your photo, decide if you are going to take a wide, full body shot or a close up. Make sure you are not cropping out feet, etc. I also recommend leaving a little extra space around your photo in case you need to straighten it later.
Take Better Pictures: After You Take the Photo
Okay, we’ve talked a lot about setting up the shot. I bet you didn’t realize how much goes into preparing to take the photo. By this point, you’ve cleaned your lens, found the best lighting, cleaned up the area and framed the shot. Now its time to edit the photo.
Take Better Photos: Editing
While we all want our photos to look great Straight Out of Camera (SOOC), its not always possible. Even if your photos look great, it may be necessary to edit them a bit for consistency. For example, for your instagram feed.
Easy Edits
This is something I see all.the.time. All little attention to your photo after you take it can go a long way. Crooked photos are not only a pet peeve of mine but I dead giveaway
Even a candid looking photo that you see on instagram is likely not a true candid. Let me repeat this- it is okay to take some time to set up the shot. Clean up the background, find the best light. Move your subject from inside to natural light. Take a few moments to edit the photo or add your personal touch with a preset. Sometimes I use the Light and Airy Presets. They make ones you can use on your phone or on your computer (you have to buy them separately). I do caution you to be careful with presets and use them sparingly. They can look really fake if not used properly.
What I wish I knew when I started
Don’t be afraid to take your time to get it right. This is especially true when you are taking pictures of people. I wasn’t confident enough in the beginning to take my time and work the couple or family into a pose that works for them. Or scrap a location if the lighting wasn’t good.
Styling Secrets BONUS!
When I first got started in photography I used to get sooooooo disappointed after a session that my pictures weren’t looking high-end or editorial enough. My exposure was perfect, I was choosing the best lighting and my poses were good. As it turns out, I didn’t love how my pictures were turning out because of how my families (which is what I was shooting at the time) were styled. I also want to point out that this was 100% my fault-not theirs! I didn’t educated them on the importance of professional hair and makeup or give them any tips about what to wear. When I started shooting weddings, all of the sudden, my images began to look more high-end. Its because my brides always had professional hair and make up on, a beautiful dress, gorgeous flowers, etc. Nothing changed about how I was taking the pictures, yet all of the sudden, my images were looking more editorial. I decided to test this theory by educating my clients about what to wear and how to prepare for their sessions. When they booked their wedding with me, I sent them a style guide, which helped them decide what to wear.
Now, you may not think this applies to you- maybe you are a florist and you are just trying to take photos of your work. I bring it up because I want you to consider that it may not be your technique that’s the problem.
Using a Styling Board
Purchasing a styling board really seemed to elevate my brand. As a wedding photographer, I spend the first hour on a wedding day shooting details. When I first started shooting weddings, I didn’t even know what a styling board was! In case you are in the same boat- a styling board is basically a pretty background to place items on to take pictures. You’ve probably seen them all over Pinterest and Instagram without even knowing it. Its a great way to take pretty pictures of wedding day details such as, invitation suites, flowers, boutonnieres, rings, jewelry, etc. If you think this doesn’t apply to you- think again! Start to think outside of the box on this one. If you are a make-up artist, consider using a styling board to showcase what’s in your personal make-up bag or your must have products for any bride. You can style them in a pretty way on this flat board and take a picture from above, making sure to crop the photo so you can only see the board.
Also called a flatlay
Play with Color (blue = relaxing
Add Scale (large and small
Fill the frame
Guide their eyes
Change your perspective
Avoid ceiling in your photos- when shooting super wide (like on an iphone) its easy to get too much ceiling in the frame.
Apps I Use
Lightroom
Unfold
Pass
Pixieset
Plannoly
So there you have it! I would love to know, what did you think of this post? Was it helpful? I would love to see some photos you took before this post and how they look after. Also be sure to email me with any questions you have! I plan to update this post frequently, to clarify anything you guys need help with. And its not just to improve my SEO : )
Take Better Photos Series
Take Better Pictures Without a DSRL
Photography Gear Recommendations